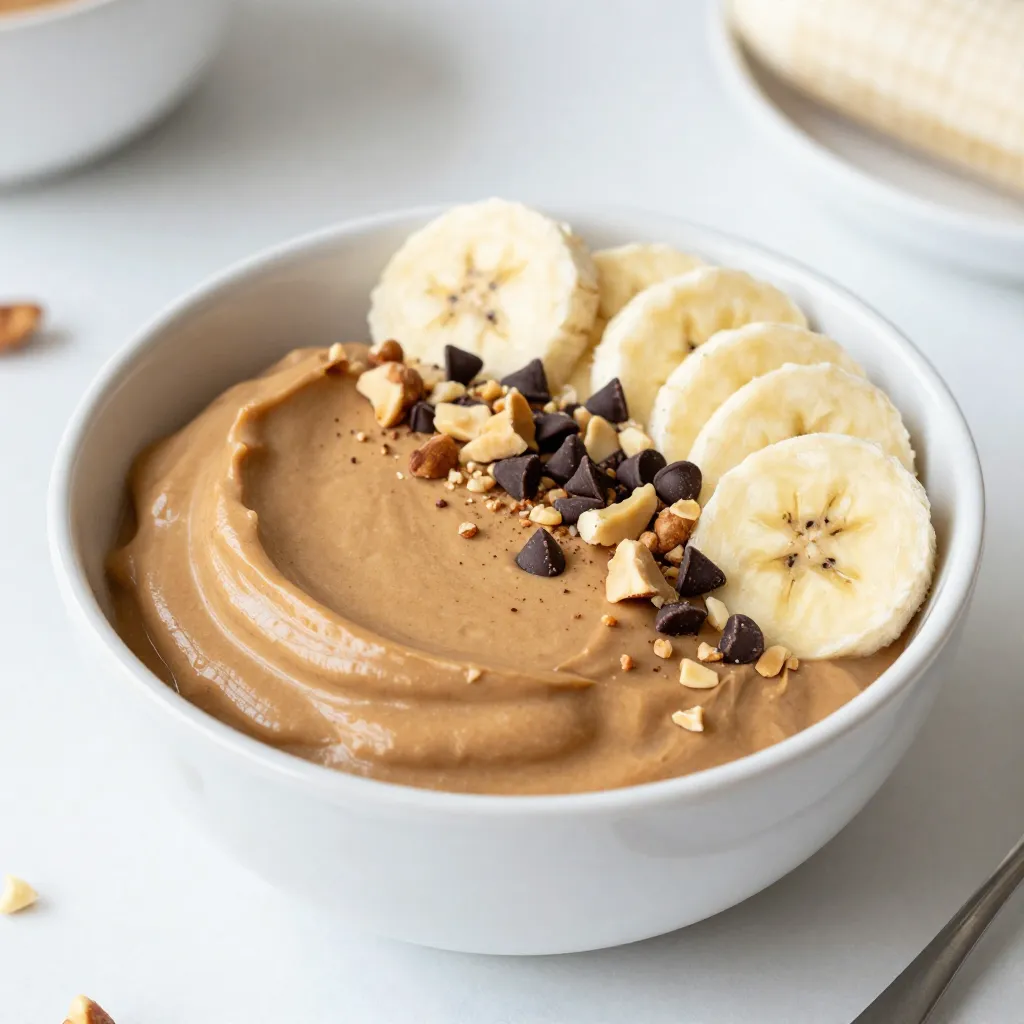
Craving a creamy treat that’s both tasty and healthy? Look no further than my Peanut Butter Banana Nice Cream Dreamy Delight Recipe! This simple dish combines ripe bananas and smooth peanut butter for a dessert that feels indulgent but is guilt-free. With easy steps and a few wholesome ingredients, you can whip up this frozen delight in no time. Let’s dive into the world of nice cream that’s sure to satisfy your sweet tooth!
Why I Love This Recipe
- Deliciously Creamy: This nice cream has a rich, velvety texture that is incredibly satisfying and reminiscent of traditional ice cream.
- Healthy Indulgence: Made with natural ingredients, this dessert is a guilt-free treat that’s packed with nutrients.
- Easy to Make: With minimal prep time and simple steps, this recipe is perfect for a quick and delightful dessert.
- Customizable Toppings: You can personalize your nice cream with a variety of toppings to suit your taste, making it even more enjoyable.
Ingredients
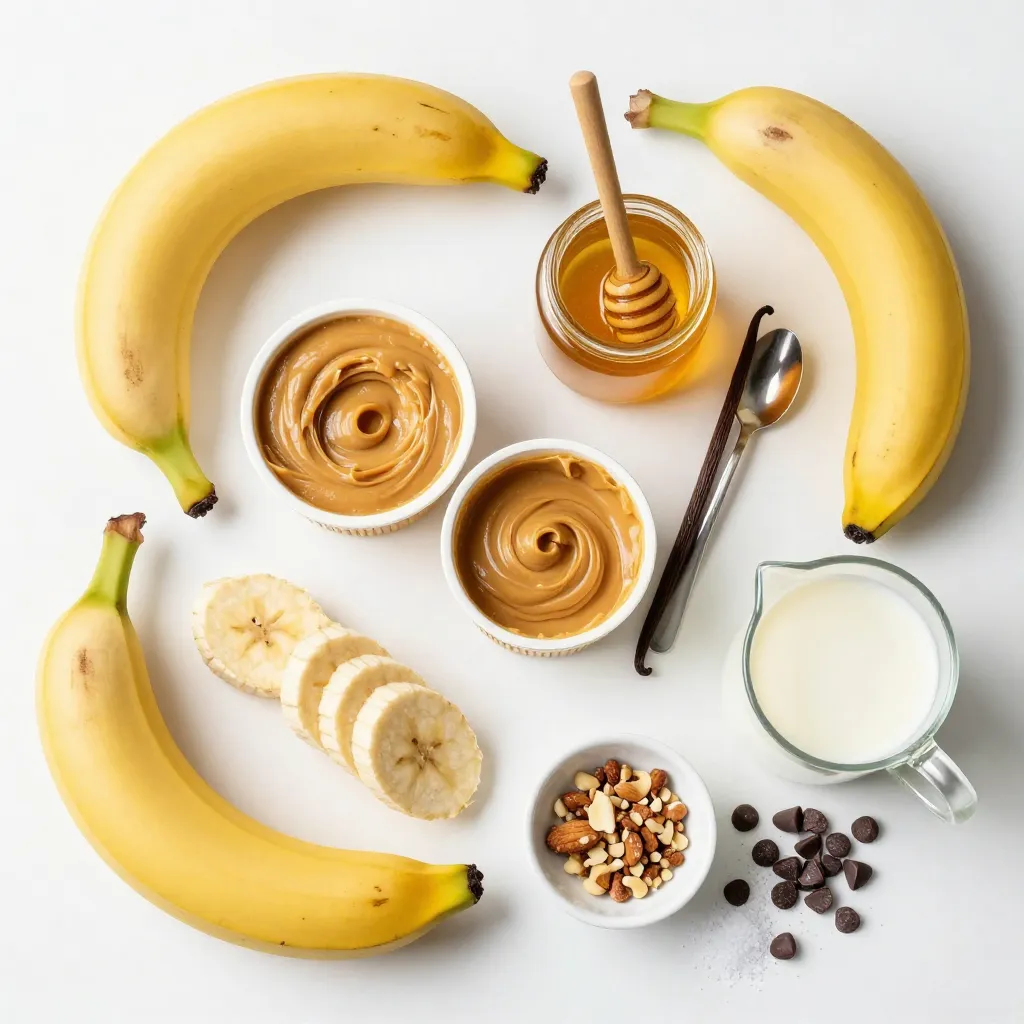
List of Essential Ingredients
– Ripe bananas
– Creamy peanut butter
– Honey or agave syrup
– Vanilla extract
– Unsweetened almond milk
– Sea salt
– Optional toppings
To make Peanut Butter Banana Nice Cream, you need simple and tasty ingredients. Start with ripe bananas. Use bananas that are yellow with a few brown spots. These will be sweeter and creamier.
Next, grab creamy peanut butter. I love using the natural kind with no added sugar. It makes the nice cream rich and smooth.
For a touch of sweetness, you can add honey or agave syrup. Both work well, but agave is perfect for a vegan treat.
A splash of vanilla extract adds wonderful flavor. This small amount makes a big difference.
Unsweetened almond milk helps blend everything smoothly. You can use any milk you like, but almond milk keeps it light.
A pinch of sea salt enhances all the flavors. Don’t skip it!
Lastly, consider optional toppings. Chopped nuts, chocolate chips, or extra banana slices can make your nice cream even more special. Enjoy making this delightful treat!
Step-by-Step Instructions
Preparing the Bananas
– Start by peeling and slicing 4 ripe bananas.
– Arrange the slices in a single layer on a baking sheet lined with parchment paper.
– Place the baking sheet in the freezer.
– Freeze the banana slices for about 2-3 hours, until they are firm.
Blending the Mixture
– After freezing, let the bananas sit at room temperature for about 5 minutes.
– This step helps them soften slightly, making blending easier.
– In a food processor, combine the frozen bananas with 1/2 cup creamy peanut butter, 1 tablespoon honey, 1 teaspoon vanilla extract, 1/2 cup almond milk, and a pinch of sea salt.
– Blend the mixture. Pulse until it is smooth and creamy.
– If it is too thick, add a splash more almond milk to help it blend.
– Taste your nice cream and adjust the sweetness with more honey if needed.
Serving Suggestions
– For a soft-serve texture, scoop and serve the nice cream right away.
– If you want it firmer, transfer it to an airtight container.
– Freeze for an additional 30 minutes before serving.
– Serve in bowls or fill ice cream cones for fun.
– Add your favorite toppings, like chopped nuts or chocolate chips, for extra flavor.
Tips & Tricks
Achieving the Perfect Texture
To get the best texture in your nice cream, decide if you want it soft-serve or firm. For soft-serve, enjoy it right after blending. If you want it firmer, freeze it for another 30 minutes.
Always taste your mixture before serving. You can adjust the sweetness by adding more honey or agave syrup. This way, you can make it just right for you.
Kitchen Equipment Recommendations
A good food processor makes this recipe easy. Look for one that has at least 600 watts of power. Brands like Cuisinart or Ninja work well. They can blend the frozen bananas smoothly.
You will also need a baking sheet and parchment paper for freezing. A spatula helps scrape down the sides of the bowl. This ensures all ingredients mix well.
Enhancing Flavor Variations
Want to add a twist? Spices like cinnamon or nutmeg can add warmth. You might also try a tablespoon of cocoa powder for a chocolatey taste.
Mix in extras like chopped nuts, or chocolate chips for fun bites. Or, you can add other fruits like strawberries or mango. This makes your nice cream even more exciting!
Pro Tips
- Use Ripe Bananas: The riper the bananas, the sweeter your nice cream will be. Look for bananas with plenty of brown spots for optimal flavor.
- Experiment with Nut Butters: Feel free to try different nut butters like almond or cashew for a unique twist on flavor.
- Add a Chocolate Twist: Incorporate cocoa powder or chocolate protein powder before blending for a delicious chocolate version of this nice cream.
- Perfect Your Texture: If you prefer a creamier texture, blend longer and add more almond milk gradually until you reach your desired consistency.
Variations
Dairy-Free Options
For a dairy-free nice cream, choose milk alternatives like almond, coconut, or oat milk. Each option adds its own twist to the flavor. Almond milk keeps it light, while coconut milk offers a creamy texture.
For sweetness, try vegan sweeteners such as agave syrup or maple syrup. They blend well and keep your nice cream plant-based. Using these options makes the treat enjoyable for everyone.
Flavor Combinations
To make chocolate peanut butter nice cream, add cocoa powder or melted dark chocolate. This blend creates a rich and delicious dessert.
You can also mix in fruits or nuts for fun twists. Consider berries, chopped apples, or even crunchy granola. These add texture and extra flavor, turning your nice cream into a delightful treat.
Low-Calorie Adjustments
To lower the calories, reduce the peanut butter quantity. Use only a few tablespoons while keeping the flavor.
You can also switch to alternative sweeteners like stevia or monk fruit. They add sweetness without the extra calories. These changes make your nice cream lighter while still tasting great.
Storage Info
Proper Freezing Techniques
To keep your peanut butter banana nice cream fresh, use an airtight container. A glass or plastic container works well. Make sure it seals tightly. This prevents ice crystals and keeps the texture smooth. You can also use freezer bags. Just remove as much air as possible before sealing.
To maintain the nice cream’s creamy texture, freeze it right after blending. If you need to freeze it longer, stir it once after the first hour. This helps keep it fluffy and prevents icy bits.
Storage Duration
You can freeze nice cream for up to two weeks. After that, it may lose flavor and texture. Look for signs of spoilage. If you see ice crystals or the nice cream looks dry, it’s time to toss it. Fresh is always best!
Thawing Tips
Thaw nice cream in the fridge for a few hours before serving. This keeps it cool and creamy. If you need it fast, let it sit at room temp for about 10 minutes. Avoid using a microwave; this can make it watery and change the texture. Serve it once it’s soft enough to scoop. Enjoy this dreamy delight!
FAQs
What can I substitute for peanut butter?
You can use sun butter if you have nut allergies. Sun butter comes from sunflower seeds. It has a similar creamy texture and taste. You can also try pumpkin seed butter. This option is tasty and nut-free.
Can I make this recipe without a food processor?
Yes, you can blend the nice cream without a food processor. Use a strong blender instead. If you do not have a blender, try using a potato masher. It will take more time but works well too.
How can I customize my nice cream?
You can add flavors to make your nice cream special. Try adding cocoa powder for a chocolate twist. You can mix in fruits like strawberries or mango. For toppings, use chopped nuts, chocolate chips, or extra banana slices. Get creative and enjoy your unique nice cream!
You can create delicious nice cream using simple ingredients like ripe bananas and peanut butter. We detailed the steps: freeze the bananas, blend your mixture, and serve right away or save for later. Remember the tips for texture and flavor to find your perfect blend. Explore variations like dairy-free or low-calorie options to suit your needs. Store it properly to enjoy for weeks. With these tools and tricks, making your nice cream is easy and fun. Dive in and enjoy your own tasty trea