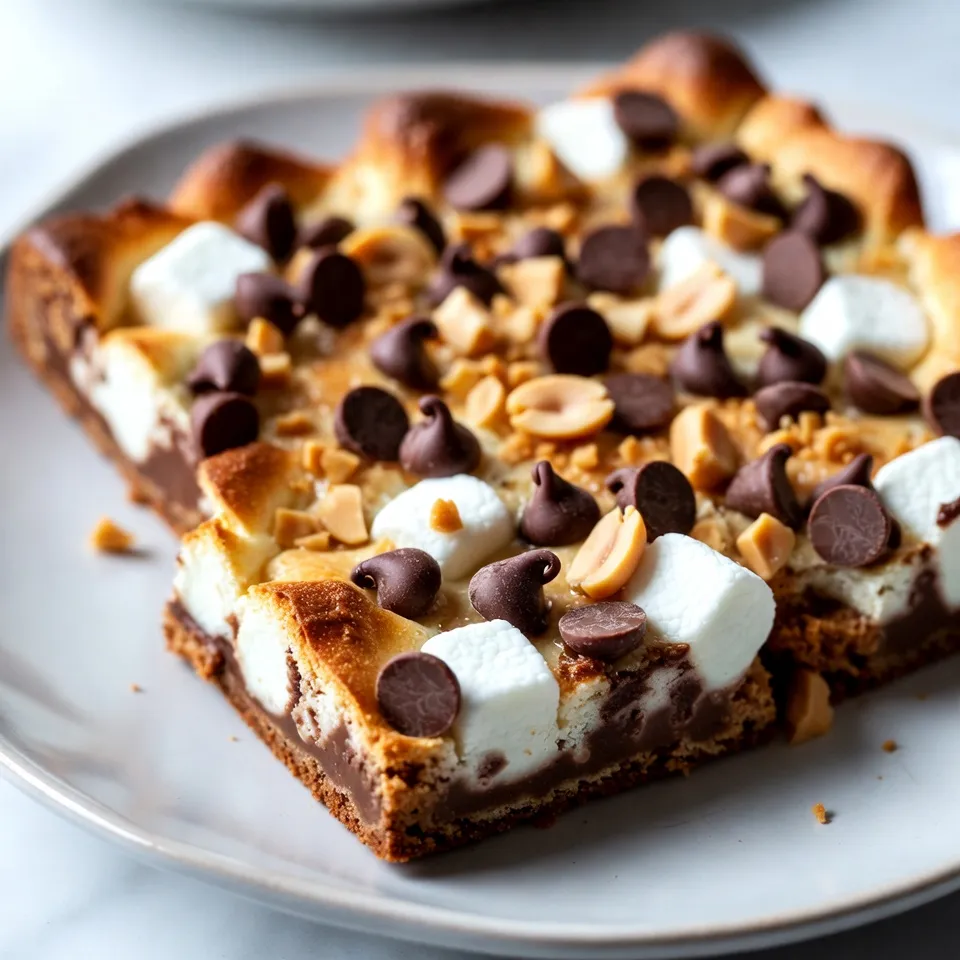
If you love s’mores and peanut butter, you’re in for a treat! In this post, I’ll guide you through a simple and tasty recipe for Peanut Butter S’mores Bars. With just a few key ingredients, you can make a delicious dessert that everyone will enjoy. Whether it’s for a party or a cozy night at home, these bars will satisfy your cravings. Let’s jump right in and whip up something sweet!
Why I Love This Recipe
- Easy to Make: This recipe requires minimal ingredients and can be whipped up in just about 10 minutes, making it a perfect quick treat.
- Delicious Flavor Combination: The combination of creamy peanut butter, chocolate, and gooey marshmallows creates a flavor explosion that’s hard to resist.
- Customizable: You can easily adjust the ingredients, like adding nuts or using different types of chocolate, to suit your taste preferences.
- Perfect for Sharing: With 16 squares in a batch, these bars are great for parties, gatherings, or just a snack to share with family and friends.
Ingredients
List of Essential Ingredients
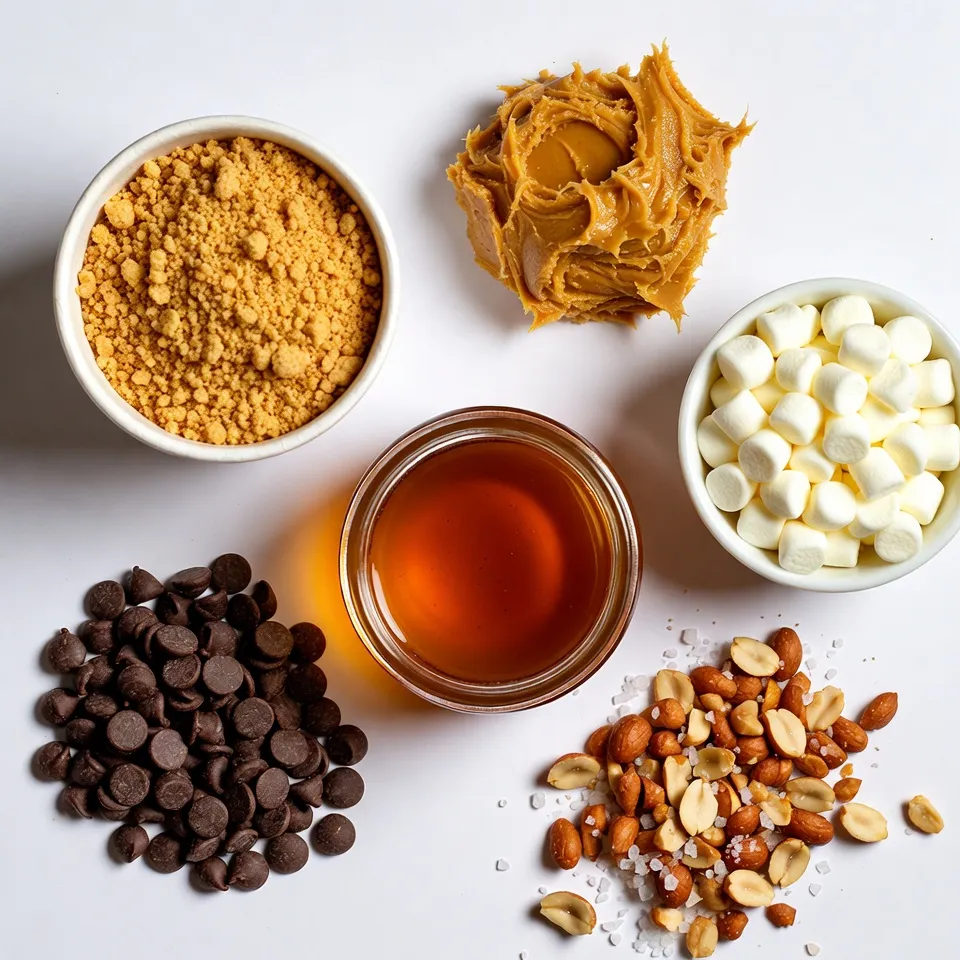
– 1 cup graham cracker crumbs
– 1/2 cup creamy peanut butter
– 1/2 cup honey or maple syrup
– 1 cup mini marshmallows
– 1/2 cup chocolate chips
– 1/4 cup chopped peanuts (optional)
– 1/4 teaspoon salt
Measurement Details
You need one cup of graham cracker crumbs. This gives the bars their nice base. Use half a cup of creamy peanut butter for a rich flavor. For sweetness, add half a cup of honey or maple syrup. You also want one cup of mini marshmallows that will melt perfectly. Chocolate chips are key, so grab half a cup. If you like crunch, use a quarter cup of chopped peanuts. Lastly, don’t forget a pinch of salt. I recommend using a natural peanut butter that doesn’t have added sugar. For chocolate, semi-sweet or dark chocolate chips work well.
Possible Substitutions
If you want to swap honey, use agave syrup or brown rice syrup. For a gluten-free option, look for gluten-free graham crackers at your local store. You can also use crushed rice cakes instead of graham crackers if you like.
Step-by-Step Instructions
Preparation Steps
1. First, preheat your oven to 350°F (175°C). This step ensures even baking.
2. Next, prepare an 8-inch square baking pan with parchment paper. Leave some paper hanging over the edges. This helps you lift out the bars later.
Mixing the Base
1. In a medium mixing bowl, combine 1 cup of graham cracker crumbs with 1/4 teaspoon of salt.
2. Add 1/2 cup of creamy peanut butter and 1/2 cup of honey or maple syrup.
3. Mix everything together using a spatula. Keep mixing until it becomes smooth and thick like cookie dough.
Assembling the Bars
1. Take about two-thirds of the mixture and press it into the pan. This forms the base layer.
2. Evenly spread 1 cup of mini marshmallows and 1/2 cup of chocolate chips over the base. Make sure they are well spaced.
3. Crumble the remaining one-third of the mixture on top. Gently press it down so it sticks.
Baking and Cooling
1. Place the pan in the oven and bake for 15-18 minutes. Look for golden brown marshmallows.
2. Once baked, take the pan out and let it cool for about 10 minutes.
3. Use the parchment paper to lift the bars out. Then, place them on a wire rack to cool completely before cutting into squares.
Tips & Tricks
Perfecting the Recipe
To ensure even melting of marshmallows, spread them out well. Place them in a single layer on top of the chocolate chips. This way, every bite gets that soft, gooey marshmallow goodness. If you want them extra fluffy, broil them for a minute after baking. Watch them closely so they don’t burn.
When pressing the mixture firmly, use a flat-bottomed glass or your hands. Press down hard enough to create a solid base. This helps the bars hold together. If it’s too loose, they will crumble when cut.
Storage Tips
For best storage, keep the bars in an airtight container. This keeps them fresh and chewy. You can store them at room temperature for about a week. If you want to keep them longer, place them in the fridge. They can last up to two weeks there.
Presentation Tips
Serve the bars on a colorful plate for a fun touch. You can drizzle melted chocolate over the top. This adds a nice visual and taste boost. Garnish with whole roasted peanuts for a rustic finish. It makes them look even more inviting!
Pro Tips
- Use Natural Peanut Butter: Choose a natural peanut butter without added sugars or hydrogenated oils for a healthier option that enhances the flavor.
- Perfectly Golden Marshmallows: Keep an eye on the marshmallows while baking to ensure they turn golden brown without burning, which adds a lovely toasted flavor.
- Chill for Easier Cutting: If you find the bars too soft to cut, refrigerate them for about 30 minutes after cooling to room temperature. This makes slicing much easier.
- Customize with Toppings: Feel free to experiment with toppings like drizzled chocolate, crushed cookies, or even a sprinkle of sea salt for added flavor and decoration.
Variations
Flavor Variations
You can change up the chocolate in your bars. Try using dark chocolate for a richer taste. You can also use milk chocolate for a sweeter treat. If you want something fun, use flavored chocolate chips like mint or caramel. Adding flavored peanut butter opens up even more choices. You might try chocolate peanut butter or honey-roasted peanut butter. These small changes can make your bars exciting.
Dietary Variations
For a vegan option, switch honey for maple syrup. You can also use plant-based butter instead of regular butter. This keeps the bars tasty while sticking to a vegan diet. If you want a low-sugar version, you can use sugar-free chocolate chips. You can also reduce the honey or maple syrup. This way, you can enjoy your treat without added sugars.
Seasonal Variations
Seasonal ingredients can add fun to your bars. In fall, add pumpkin spice to the mixture for a cozy flavor. In winter, try topping the bars with crushed candy canes for a festive touch. You can also decorate the bars with sprinkles for birthdays or other celebrations. These little changes can make your bars fit any occasion.
Storage Info
Best Practices for Storage
To keep your peanut butter s’mores bars fresh, use an airtight container. This keeps moisture out and helps them stay soft. You can store them at room temperature for up to three days. If you want them to last longer, put them in the fridge. Just remember, cold bars may be a bit firmer.
Freezing Instructions
If you want to freeze your bars, cut them into squares first. Wrap each piece tightly in plastic wrap. Then, place them in a freezer-safe bag. They can last up to three months in the freezer. When you want to enjoy them, take them out and let them thaw at room temperature. This will help them return to that perfect chewy texture.
Shelf Life
Homemade peanut butter s’mores bars can last about a week at room temperature. In the fridge, they can stay fresh for up to two weeks. Watch for signs of spoilage. If they smell off or feel too hard, it’s best to toss them. Always trust your senses when it comes to food safety!
FAQs
Common Questions
How do I make these bars gluten-free?
To make these bars gluten-free, use gluten-free graham crackers. Many brands offer great options. Just check the label to ensure they are certified gluten-free. The rest of the ingredients, like peanut butter and chocolate chips, are naturally gluten-free.
Can I use crunchy peanut butter instead?
Yes, you can use crunchy peanut butter! It adds a nice texture to the bars. The crunch will mix well with the soft marshmallows and chocolate. Just remember that it will change the texture a bit, but that can be a fun twist!
Troubleshooting
What to do if the bars are too crumbly?
If your bars are too crumbly, try adding a bit more peanut butter or honey. This will help bind the ingredients together better. You can also press the mixture more firmly into the pan. That can help hold everything in place.
How to fix burnt marshmallows on top?
If your marshmallows burn, don’t worry! You can scrape off the burnt bits gently after cooling. If you catch them early, just lower the oven temperature next time. Keep an eye on them when baking, and they should turn a nice golden brown.
Serving Suggestions
What drinks pair well with peanut butter s’mores bars?
These bars go well with milk or hot cocoa. The creaminess of milk balances the rich flavors. You could also enjoy them with coffee for a tasty treat. Try a scoop of vanilla ice cream on the side for a fun dessert!
Can these be served at parties or gatherings?
Absolutely! Peanut butter s’mores bars are perfect for parties and gatherings. They are easy to cut into squares and share. Guests will love the sweet and salty flavor. You can even decorate the platter with some whole peanuts and chocolate drizzle for a fun touch!
You now know how to make delicious peanut butter s’mores bars. We covered essential ingredients, from graham cracker crumbs to chocolate chips. You learned the steps to prep and bake, ensuring perfect results. Remember the tips for storage and variations to keep it fresh and exciting.
Enjoy these bars as a sweet treat or at gatherings. Experiment with flavors and share your creations. Happy bakin